1. Introduction
Brake pad wear indicators are one of those small features that can save you money and hassle—if you understand how they work and react in time. On the VW Golf Mk6 1.6 TDI (common engine codes include CAYC and CAYB), the system is simple compared with newer cars, but it still catches many owners out: some cars have an electronic wear sensor, some rely purely on the mechanical “squeal tab,” and others may have had brakes replaced in the past with parts that change how warnings appear.
Recommended Tool: Professional OBD2 Scanner
Recommended Tool: Premium Brake Pads
Recommended Tool: Cooling System Diagnostic Tools

This article explains what the wear indicators do, why they trigger, how to diagnose them properly, and what you should do next. The focus is practical advice for everyday European car owners, especially those used to VW Group systems (and familiar with how BMW, Mercedes, Audi and JLR handle brake warnings differently). Where relevant, we’ll reference workshop-level tools like ODIS (VW Group diagnostics) and how the Golf’s approach differs from systems you might know from ISTA (BMW), Xentry (Mercedes) or SDD/Pathfinder (JLR).
🔧 Recommended Professional Tool
Cooling System Diagnostic ToolsProfessional coolant tester and infrared thermometer for accurate overheating diagnosis.
✔ Recommended by automotive technicians ✔ Suitable for BMW, Mercedes, VAG & JLR platforms ✔ Fast international shipping
2. Causes
Brake pad wear indicators trigger for a few common reasons—some expected, some avoidable:
- Normal pad wear: The friction material gradually thins with mileage and driving style.
- Uneven wear: Often caused by sticking caliper slider pins, a partially seized caliper piston, or poor-quality pads.
- Worn discs (rotors): A lipped or heavily worn disc can accelerate pad wear and create noise earlier than expected.
- Incorrect pad fitment: Some aftermarket pads don’t include the correct provision for a wear sensor, or the sensor is routed incorrectly.
- Sensor damage (if equipped): The wear sensor wiring can be clipped by the wheel, pinched during brake work, or damaged by corrosion.
- Driving conditions: Frequent stop-start driving, steep hills, towing, or heavy loads will wear pads faster than motorway cruising.
On many Golf Mk6 variants, the wear warning (if present) is typically on one axle and often one wheel only (commonly front left on many VAG applications). That means you can have “warning on” even though other pads look fine.
3. Symptoms
Your Golf may tell you about pad wear in different ways depending on equipment level and previous repairs.
Typical symptoms
- Brake warning light or message on the dash (for cars with an electronic wear sensor).
- High-pitched squeal when braking lightly (mechanical wear tab contacting the disc).
- Longer stopping distances or a softer pedal feel (usually when pads are very low or discs are damaged).
- Grinding noise (urgent: pad material may be gone and the backing plate is contacting the disc).
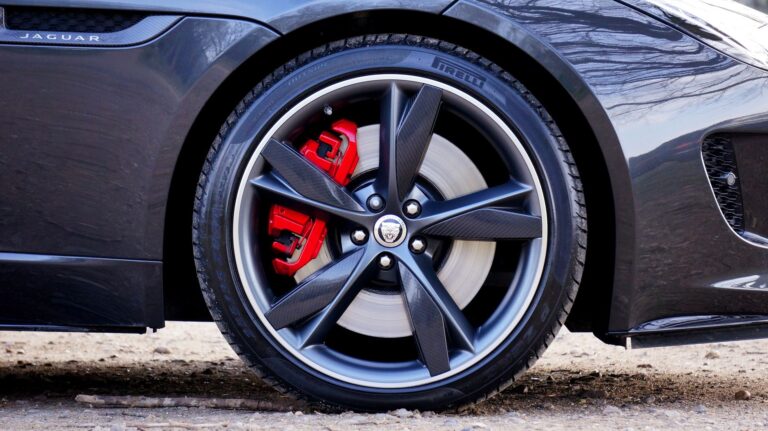
- Visible low pad thickness through the wheel spokes (sometimes easiest to spot on the outer pad).
Less obvious symptoms
- One wheel significantly dirtier with brake dust (can point to a sticking caliper).
- Car pulls slightly under braking (uneven pad/disc condition side to side).
- Recent brake work followed by an immediate warning (often sensor unplugged, damaged, or not reset/cleared properly).
4. How to diagnose
You can do a meaningful check at home, but don’t guess—brakes are safety-critical.
Step-by-step checks (owner-friendly)
-
Confirm which system you have
- Look behind the wheel at the caliper area for a small wire harness going into the pad. If present, you have an electronic wear sensor on that corner.
- If there’s no wiring, your car likely relies on a mechanical squeal tab and visual inspection.
-
Visually check pad thickness
- Through the wheel or with the wheel removed, inspect both outer and inner pads. Inner pads often wear faster and are harder to see.
- As a rough guide, 3 mm or less is “plan replacement,” and 2 mm or less is “replace now.”
-
Inspect discs
- Look for deep grooves, heavy rust bands, or a pronounced outer “lip.”
- If the disc surface is rough or uneven, new pads may not bed in properly.
-
Check for uneven wear
- Compare left vs right on the same axle. Big differences suggest a caliper/slider issue, not just normal wear.
-
If you have a warning light, scan for codes
- A basic OBD scanner may not show brake pad wear faults clearly. A VW-capable tool or ODIS at an independent workshop will identify relevant instrument cluster or brake-related faults.
- If you’re coming from other brands: BMW’s ISTA and Mercedes Xentry often display remaining pad life estimates; the Golf Mk6 system is usually more basic (trigger/no trigger).
-
Check the sensor wiring (if fitted)
- Look for chafing, broken insulation, or a loose connector.
- If pads were recently changed, ensure the sensor is properly seated and the wire is clipped in the original routing points.
5. How to fix
The correct fix depends on whether you’re dealing with normal wear, a sensor fault, or a braking hardware issue.
Replace pads (and often discs)
- If pads are low, replace them as an axle set (both front or both rear).
- Discs should be replaced if:
- They are below minimum thickness (check the disc hat marking or service data).
- They are heavily grooved, cracked, or badly lipped.
- You’re fitting new pads and the discs are near the end of life.
Replace or repair the wear sensor (if equipped)
- Many VAG setups integrate the sensor into the pad or use a separate sensor lead—either way, replace damaged components rather than “bypassing” them.
- After fitting, any warning may clear automatically after a short drive, but sometimes a fault code needs clearing with a VW-capable scanner/ODIS.
Address underlying causes of uneven wear
If one pad is much thinner than the other:
- Clean and lubricate caliper slider pins with correct high-temperature brake grease.
- Check the caliper piston boot for damage and signs of sticking.
- Inspect brake hoses for swelling (less common, but can cause dragging).
Bedding-in (important for feel and noise)
After replacement:
- Follow the pad manufacturer’s bedding-in procedure.
- Avoid harsh braking for the first 200–300 km unless safety requires it.
6. Repair costs
Prices vary by country, brand of parts, and whether you use a main dealer or a good independent. Below are realistic ballpark ranges for a VW Golf Mk6 1.6 TDI in Europe (parts + labour).
Front axle
- Pads only: €160–€280
- Pads + discs: €300–€520
- Wear sensor (if separate): add €20–€60
Rear axle
- Pads only: €150–€260
- Pads + discs: €280–€480
If there’s a caliper/slider issue
- Slider service/cleanup: €60–€140 (often added to a brake job)
- Caliper rebuild or replacement (one side): €180–€420
- Brake fluid change (recommended every 2 years): €70–€130
Main dealers can be higher, especially if they only fit OEM parts. Good independents often offer a choice between OEM-equivalent brands (ATE, TRW, Zimmermann, Brembo) and genuine parts.
7. Prevention tips
A few habits and checks will help you get predictable pad life and fewer surprises:
- Check pad thickness at every tyre rotation or at least twice a year.
- Avoid resting your foot on the brake pedal (creates constant light braking and heat).
- Rinse wheels in winter to reduce salt corrosion around calipers and sensors.
- Use quality parts—cheap pads can wear faster, squeal more, and create more dust.
- Service caliper sliders when doing pads, especially if you drive in wet/salty conditions.
- Change brake fluid on schedule; old fluid can contribute to sticking pistons and inconsistent braking.
8. When to see a mechanic
Book a workshop visit promptly if any of the following apply:
- You hear grinding or the car makes strong metal-on-metal noises.
- The car pulls to one side under braking.
- The brake warning stays on after pad replacement, or you suspect a sensor wiring fault.
- You notice one wheel overheating or a burning smell (possible dragging caliper).
- The brake pedal feels spongy, travels further than normal, or the ABS/ESP lights appear.
A professional shop with ODIS can confirm whether the warning is genuine pad wear or an electrical issue, and they can measure disc thickness accurately and spot caliper problems early.
9. Frequently Asked Questions
Frequently Asked Questions
Does every VW Golf Mk6 1.6 TDI have an electronic brake pad wear sensor?
No. Many Mk6 Golfs rely on a mechanical wear tab and visual inspection, while some trims or brake setups include an electronic sensor on one wheel. If you see a wire going into the pad, you have the electronic type.
Can I replace only the pad that triggered the wear indicator?
It’s strongly recommended to replace pads in axle pairs (both sides) to keep braking balanced. Replacing only one side can cause pulling, uneven braking and faster wear on the new pad.
Why did my warning light come on right after a brake service?
Common causes include a damaged sensor lead, an unplugged connector, incorrect routing so the wire rubs the wheel, or pads that don’t match the sensor setup. A scan with a VW-capable tool or ODIS can confirm whether the circuit is open/shorted.
Do I need to replace discs every time I replace pads?
Not always. If discs are within thickness limits and in good condition, pads alone can be fine; however, worn or lipped discs can reduce braking performance and make new pads noisy. Many owners choose pads and discs together for best results and predictable feel.
Is it safe to keep driving when the wear indicator comes on?
You should treat it as “service soon,” not “ignore.” You may still have some pad material left, but wear can accelerate quickly, and if you reach the backing plate you can damage discs and lose braking performance. Arrange an inspection within days, not weeks.