1. Introduction
Rear suspension arms don’t get much attention until the car starts feeling loose, noisy, or uneven over bumps. On the Audi A4, especially the B8 (2008–2015) and B9 (2015–present) generations, the rear multi-link setup relies on several individual arms and bushings to control toe and camber while keeping the ride comfortable. When one arm’s bushing wears or a ball joint develops play, it can upset the whole balance: tyre wear increases, stability can feel inconsistent in fast corners, and the car may become less predictable on wet European roads.
Recommended Tool: Professional OBD2 Scanner
Recommended Tool: Premium Brake Pads
Recommended Tool: OEM Suspension Components
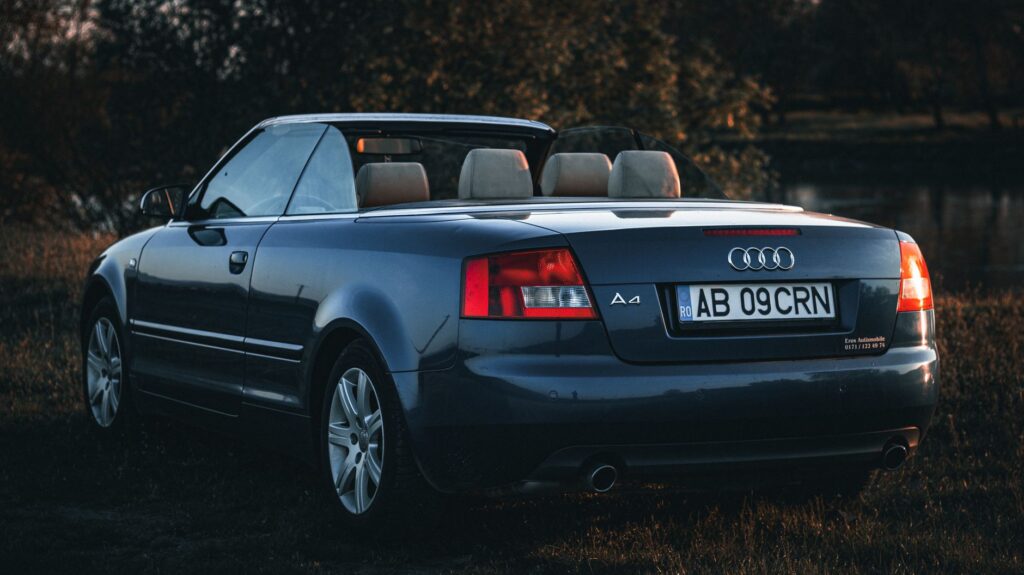
This guide explains rear suspension arm replacement step by step in owner-friendly terms. It’s written for everyday European drivers who want to understand what’s involved, what it costs, and how to avoid repeat repairs—whether you drive an Audi, or you’re comparing ownership experiences with BMW, Mercedes, VW Group, or JLR vehicles.
🔧 Recommended Professional Tool
DSG Transmission Service KitProfessional tools for DSG gearbox service
✔ Recommended by automotive technicians ✔ Suitable for BMW, Mercedes, VAG & JLR platforms ✔ Fast international shipping
2. Causes
Rear suspension arms usually fail gradually. Common reasons include:
- Bushing wear and cracking: Rubber degrades from age, heat cycles, and road salt. This is common on higher-mileage B8 cars and on B9 cars used on rough roads.
- Ball joint play (on arms that use ball joints): Impacts, water ingress, and worn protective boots accelerate wear.
- Corrosion at fasteners and sleeves: European winter salt can seize bolts inside bushing sleeves, making removal difficult and sometimes forcing replacement of extra hardware.
- Overloading and poor road surfaces: Repeated heavy loads, potholes, or aggressive speed bump impacts stress the arms.
- Incorrect tightening: Suspension bushings must typically be tightened at ride height. Tightening while the suspension is hanging can pre-load bushings and shorten their life.
3. Symptoms
A worn rear suspension arm often announces itself in subtle ways before it becomes obvious. Watch for:
- Clunking or knocking from the rear over small bumps or when pulling away
- Squeaking/creaking at low speeds (often bushing-related)
- Rear-end “steer” feeling: the car feels like it shifts slightly mid-corner or when changing lanes
- Uneven rear tyre wear, especially on the inner edge (camber/toe changes)
- Steering wheel not straight after a rear alignment issue (yes, rear toe can influence this)
- Instability under braking, particularly on uneven surfaces
On quattro models, a rear geometry issue can feel like drivetrain harshness or “binding,” but it’s often alignment drift caused by worn links rather than a gearbox problem.
4. How to diagnose
You can do a first-pass diagnosis at home, but a proper confirmation often needs a lift and an alignment-style inspection.
Basic checks you can do
- Visual inspection (wheel on or off): look for cracked rubber, leaking hydraulic bushings (if fitted), torn dust boots, or shiny metal where parts have been rubbing.
- Tyre wear pattern: inner shoulder wear on the rear tyres is a classic sign of camber/toe issues.
- Bounce and listen: gently rock the rear corner of the car and listen for clicking or knocking (not always conclusive, but helpful).
Better checks on a lift (or safe axle stands)
- Pry-bar test: a technician will apply controlled leverage near the bushing to see if it moves excessively.
- Wheel play checks: not just 12/6 o’clock and 9/3 o’clock, but also observing link movement while the hub is loaded.
- Compare sides: rear arms often wear unevenly depending on road camber and parking habits.
Diagnostic tools and workshop confirmation
Rear arm wear doesn’t always trigger fault codes, but a workshop may still use OEM tools during an overall chassis check:
- ODIS (Audi/VW): for reading chassis-related DTCs, steering angle calibration status, and verifying any adaptive systems that may need recalibration after alignment.
- If you cross-shop: ISTA (BMW), Xentry (Mercedes), Pathfinder/SDD (JLR) are often used similarly during chassis inspections, even when the root cause is mechanical.
A four-wheel alignment printout is one of the most useful “diagnostic reports” you can get. If rear toe is out of spec and won’t adjust evenly, a bent or worn arm is a strong suspect.
5. How to fix
Replacing a rear suspension arm is straightforward in concept, but the details matter. The exact arm varies (upper/lower control arm, toe link, trailing arm), so always confirm by VIN and axle code.
Step-by-step overview (owner-friendly)
- Confirm which arm is worn
- Don’t guess. A proper inspection identifies the specific link(s) with play or torn bushings.
- Plan parts and hardware
- Many Audi rear suspension bolts are “stretch” (single-use) or at least recommended to be replaced. New nuts/bolts reduce the chance of loosening and make future work easier.
- Raise the car safely
- A workshop uses a lift; at home you’d need high-quality axle stands on solid ground. Rear suspension work requires stability and space.
- Remove the wheel
- This provides access and allows clear inspection of the arm’s mounting points.
- Support the hub/control arm
- The hub is supported so it doesn’t drop and strain brake hoses or ABS wiring when the arm is removed.
- Remove the arm fasteners
- Expect seized bolts on older B8s. Heat, penetrant, and patience are common. In worst cases, bolts seize inside bushing sleeves and require cutting.
- Install the new arm
- Fit it loosely first. Ensure bushings sit correctly and ball joint tapers (if present) seat properly.
- Tighten at ride height
- This is critical. The final torque is applied when the suspension is at normal ride position (either on alignment ramps or by supporting the hub to simulate ride height). This prevents bushing pre-load.
- Get a four-wheel alignment
- Replacing a toe link or any geometry-influencing arm typically changes alignment. Skipping alignment can destroy tyres quickly and undo the benefit of the repair.
- Re-check after a short drive
- A reputable shop will road test and verify no noises, then confirm torque marks if used.
“Should I replace one arm or both sides?”
If one side is worn and the other is original with similar mileage, replacing in pairs is often sensible—especially for toe links and upper arms—because wear rates tend to be similar. However, if inspection shows the opposite side is genuinely tight and the budget is limited, replacing only the failed side is acceptable as long as alignment is done.
6. Repair costs
Costs vary by country, brand of parts, and how seized the hardware is. Typical European ranges (parts + labor):
- Single rear arm replacement (one side): €250–€550
- Parts: €60–€220 (aftermarket vs OE)
- Labor: 1.0–2.0 hours typical
- Pair of rear arms (both sides): €450–€950
- Additional seized bolt/corrosion time: +€50–€250
- Four-wheel alignment: €90–€180
If multiple arms are worn (common on higher-mileage B8 cars), a “refresh” can reach €900–€1,800 including alignment, especially if several links and hardware are replaced together. Compared with drivetrain repairs (for example DSG or ZF 8HP service work), this is often money well spent because it directly affects safety and tyre costs.
7. Prevention tips
You can’t stop rubber ageing, but you can slow wear and reduce repeat failures:
- Avoid potholes and sharp kerb impacts where possible; slow down for speed bumps.
- Keep tyres correctly inflated; underinflation increases suspension stress.
- Wash the underside in winter (especially after salted roads) to reduce corrosion on bolts and sleeves.
- Align the car when tyres are replaced or if you notice uneven wear early.
- Don’t ignore minor rear noises; catching a worn bushing early can prevent secondary tyre damage.
- If your A4 has been lowered or runs very large wheels, expect faster bushing wear and plan inspections more often.
8. When to see a mechanic
See a qualified workshop if:
- You hear repeated knocking from the rear over small bumps
- The car feels unstable at motorway speeds or in crosswinds
- You see rapid inner-edge tyre wear
- You suspect bolts are seized or you don’t have the equipment to tighten at ride height
- The car has driver-assistance or adaptive systems and you want to ensure post-repair checks are done correctly (a workshop can verify with tools like ODIS and confirm steering angle/alignment-related calibrations if required)
Suspension is safety-critical. If you’re not fully confident in safe lifting and correct torque procedures, it’s a job best left to professionals.
9. Frequently Asked Questions
Do I need a wheel alignment after replacing a rear suspension arm on an Audi A4?
Yes, in most cases you do, especially if the toe link or any camber-influencing arm was replaced. Even small changes can cause tyre wear and instability at speed. A four-wheel alignment with a before/after printout is the best confirmation the fix is complete.
Can I replace just the bushing instead of the whole arm?
Sometimes, but it depends on the exact arm design and whether the bushing is serviceable. Many owners choose complete arms because labor is similar and the result is more consistent. Pressing bushings also requires the correct tools and can go wrong if the bushing is installed at the wrong orientation.
What happens if I ignore a worn rear suspension arm?
Tyres can wear out quickly, and the car may feel unpredictable in corners or under braking. Over time, extra movement can stress other suspension links and even wheel bearings. Repairing it sooner usually reduces the total cost.
Are aftermarket suspension arms worth it compared with OE parts?
Good-quality aftermarket brands can work well and reduce cost, but very cheap arms can have soft bushings or short lifespans. If you plan to keep the car, OE or reputable OEM-equivalent parts are usually the best value. Ask the shop what brand they supply and whether they replace hardware.
Why does the rear of my car feel like it “steers” slightly after bumps?
That sensation is often rear toe changing under load due to worn bushings in a toe link or control arm. It can be subtle at first and more obvious at motorway speeds. Replacing the worn arm and aligning the car typically restores stability.